

How To Clean Tub And Shower Fixtures
Nearly modern homes take advantage of the benefits of updated manufacturing and materials, containing fiberglass or acrylic bathtubs rather than traditional porcelain-coated cast iron or stainless steel. Affordable, attractive, and durable, fiberglass is however decumbent to cracking and pitting overtime.
Fortunately, repairing a cracked or damaged tub or shower pan is a straightforward DIY task that most homeowners tin do to save themselves money over an expensive replacement. The cost to hire a professional to set problems may prove worth the minor investment to ensure the cause of the issue is addressed to prevent future problems.
This guide covers the basics for fixing all shower floors, including bases and pans, just information technology mainly focuses on the most common issue – fiberglass tub repair.
This project costs an boilerplate of $20 to $240, depending on the extent of repairs needed and whether yous hire a professional person or handle fixing the impairment on your own. Pocket-sized damage oft only requires an epoxy kit, available at most home comeback stores. More than extensive cracks and fries may require drywall mud, special two-component cream, and patches. Fifty-fifty at the high end, repairing is considerably less expensive than installing a new tub, and it usually only takes four to six hours including drying fourth dimension.
On This Folio:
- Repairing a Fiberglass Tub
- Tools Needed
- Assessing the Extent of the Damage
- Purchasing a Kit
- Steps
- Repairing a Fiberglass Shower Pan
- Care & Maintenance Tips
- Acrylic Tub & Shower
- Fixing a Tile Pan
- Tools
- Steps
- DIY vs. Hiring a Pro

Repairing a Fiberglass Tub
No affair how bad a fissure or an indentation may look, the procedure is the aforementioned as if information technology was a little pit. In either case, it'due south surprisingly elementary. Past using a basic epoxy kit with a few essential items, repairing a fiberglass tub takes as niggling as one day, with most of that time spent equally the compound dries.
Materials and Tools Needed
In general, this project requires minimal tools. For starters, y'all'll need household cleaner and a sponge to clean the area before getting started. Additionally, you'll demand:
- Protective gear (goggles, respirator or mask and gloves)
- Rotary tool
- Drill
- 80-grit sanding newspaper
- Fine grit sanding paper
- Cellophane tape
- Two-component foam
- Fiberglass mesh/textile
- Fiberglass repair kit
What Type of Repair? Crack, Chip or Pigsty?
Assessing the harm is the first step to determining the blazon of repair needed. Over time, heavy utilise can leave fiberglass, acrylic and other tub and shower materials vulnerable to cracking and chipping. Additionally, if something heavy drops on the surface, it could leave a large crack or a substantial pigsty, especially if the base of operations isn't properly supported.
Superficial chips, cracks and scratches may only require simple filling and refinishing. But for big ones, a professional person should address the potential underlying trouble and add extra back up to the structure earlier patching and refinishing the base.
What to Expect for in a Bathtub Repair Kit
To make your repair simple and stress-gratis, wait for an all-inclusive kit that has everything you demand to fix about issues. Minimally, kits include:
- Polyester resin/epoxy in putty or paste form
- Liquid hardener
- Mixing stick and tray or mat
- Sandpaper of diverse grits
- Protective gloves
- Colorants for common tub hues (i.due east. almond, off-white), if needed
- Finishing polish
For larger cracks and pits, it may also be necessary to purchase fiberglass mesh to reinforce the putty and make it less probable to dimple. As a rule, use mesh for whatever crack wider than a quarter-inch or an open hole that is too large to make full in with the resin mixture alone. More extensive issues caused by improper installation and back up may crave drilling shallow holes in the tub, filling those holes with ii-component foam, and calculation fiberglass patches before using a refinishing kit.
Render to Top
Step-by-Step Guide
Filling a small-scale hole or crack in fiberglass is a simple process, but you should set aside a whole solar day to permit time for the mixture to harden between steps. For this reason, this is a proficient job to begin in the morning time and complete throughout the 24-hour interval betwixt other home improvement projects. Repairs are similar for acrylic tubs, but nosotros'll cover the differences betwixt the 2 processes below.
-
- Gear up the Area – Before getting started, make clean the area with household cleaner and a sponge. Use rubbing alcohol, acetone, or a similar solvent capable of removing oils, soap scum, and glass fibers.
-
- Drill as Needed – When a lack of back up is the root of the problem, you need to address the issue head on. Instead of removing the tub and rebuilding the support system, drill half-dozen to eight small holes in the tub and add foam (see next step). If you aren't working on the underlying back up, but you lot're repairing a crack, utilise a rotary tool with eighty-grit sand paper to grind a bevel that's nigh 1 1/ii inches wide centered on the crack.
-
- Add Ii-Component Cream – For extra support, inject two-component cream into the holes that you drilled. Information technology sets in a few minutes and creates a strong foundation.
-
- Utilize a Patch – If using fiberglass mesh, lay it over the cleft or hole to mensurate, and and then trim it so that it is slightly larger than the opening information technology is to cover. More than one layer may exist necessary for especially deep holes.
-
- Mix the Filler – While wearing protective gloves, mix the resin putty and hardener as directed by your repair kit, calculation colorant if working with a non-white tub. Use the provided mixing stick and tray and put information technology atop a piece of scrap cardboard to prevent accidental spills onto porous bath surfaces.
-
- Repair the Crack, Fleck or Hole – Immediately spread the mixture into the crack or hole, or on top of the fiberglass mesh. Take care to work it in thoroughly to go information technology into all crevices and prevent dimpling. Don't be afraid to pile the mixture atop the hole to fill up it in completely; you will exist sanding it afterwards.
-
- Let the Mixture to Set – Allow the mixture to set up in the hole for 2-3 hours or longer for larger, deeper holes. Once set, utilise the sandpaper to advisedly smooth the surface. This might take some time and elbow grease.
- Refinish the Surface – Use the finishing polish to complete the patch and assistance the new surface area blend into the tub.
Prepare to first your Tub or Shower Pan Repairs?
Detect Pros
Return to Top

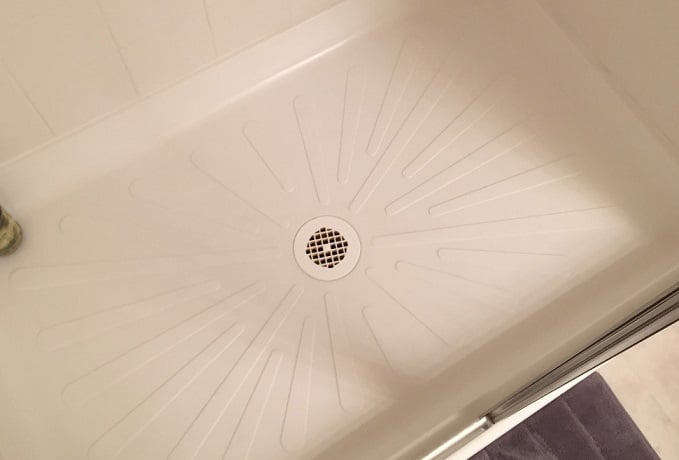
Repairing a Fiberglass Shower Pan
If you're repairing the floor of a fiberglass stall, the method you use to complete a patch is no different than in a larger tub. However, because most of the surface of the base is horizontal and apartment, information technology is possible to fix and reinforce larger holes and pits with scrap plywood in addition to epoxy, but merely if you accept admission to the back or lesser of the pan. Some quick steps are:
- Spread epoxy on the plywood and press it onto the crack, from the unexposed side of the pan, to seal it.
- Apply the upper layer of epoxy on the exposed surface and sand it down.
Return to Top
Fiberglass Tub Care and Maintenance Tips
Like most dwelling fixtures, when it comes to extending the life of your tub, preventing issues is the best solution. Your first line of defense it regular cleaning with the right type of cleaner and methods. This material responds best to balmy soap, like dish soap, or fifty-fifty just a paste of baking soda and water. This is considering the coating is sparse and subject to wearable over time. For this same reason, information technology is important to never use abrasive cleaners on these fixtures.
To maintain the luster of a single- or double-piece fiberglass tub, yous might also consider giving it a regular polishing using automotive finishing products designed for fiberglass. Avoid using waxing products on this blazon of floor equally this poses a safety risk when the shower is in use.
Ready to start your Tub or Shower Pan Repairs?
Find Pros
Return to Summit
Acrylic Tub & Shower Repair
Acrylic is another ordinarily used material that can often be repaired instead of replaced. The steps are similar, merely slightly different.
-
- Drill 1/iv-inch holes in a i-foot square around the damage, existence careful to avoid drilling all the fashion through.
-
- Fill the holes with insulating foam to halt the acrylic from flexing later on yous've repaired the scissure. Remove any foam leaking from the holes with a arts and crafts knife earlier sanding over the dried foam with a 240-grade sandpaper.
-
- Drill holes at either end of the crack, avoiding drilling through the acrylic.
-
- Use a 2-function polyester filler to repair the impairment, spreading it evenly over the drill holes and the fissure with a rubber spreader.
-
- One time the filler is dry, sand it smooth and level with the residuum of the tub's surface.
-
- Wipe over the area with denatured alcohol to remove whatsoever dust.
- Apply bathtub repair paint to create a smoothen, well-matched surface. One time the pigment dries, add a final layer of urethane compound, and buff the surface area to create a shine, hard finish.
Return to Top
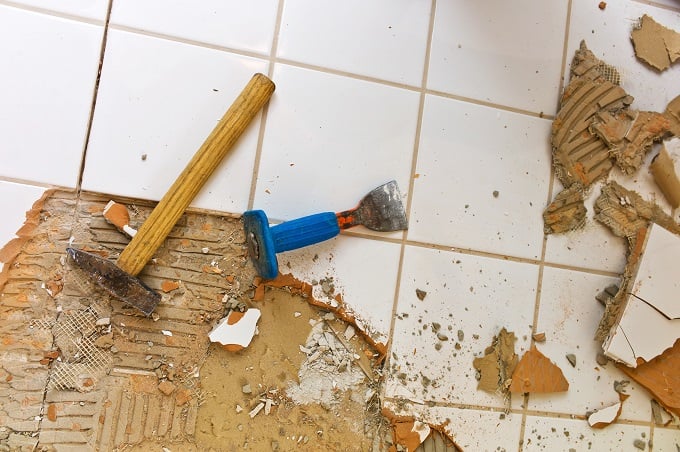
How to Repair a Tile Shower Flooring
If the crack is minor, y'all may be able to repair it without incurring the cost of retiling the area. Otherwise, you'll need to remove the damaged tiles and replace them before re-grouting.
Tools & Materials Needed
- Grout saw
- Drill with a masonry bit
- Chisel
- Scraper
- Notched trowel
- Tile adhesive or thinset
- Grout
- Sponge/rags
Step-past-Step Guide
When removing the tile,
-
- Apply a grout saw to remove the grout surrounding the affected tile/tiles.
-
- Drill a pigsty through the eye of the damaged tile, or several holes in a large tile.
-
- Suspension the tile into modest pieces using the chisel, and use the scraper to remove them along with the thinset or tile adhesive behind the damaged tile.
-
- Apply a fresh coat of thinset or tile agglutinative with a notched trowel or a putty knife if you're working in a small area.
-
- Press the new tile in place and let the adhesive dry out before grouting over the repair.
- Apply a damp sponge to remove backlog grout from the tile. Let the grout to cure before using the shower.
When repairing the tile for a minor chip or fissure,
-
- Clean the area with a mixture of oxygen bleach powder and water.
-
- Use epoxy glue over the area to level it with the rest of the tile.
-
- Paint over the repair with a porcelain affect up kit to match information technology to the undamaged tile.
-
- Permit the paint dry out and add a coat of clear urethane.
- One time everything is dry out, wipe over the area with a damp cloth.
Ready to get-go your Tub or Shower Pan Repairs?
Find Pros
Render to Acme
DIY Considerations
Depending on the extent of the damage, this is a unproblematic DIY project. If you decide to DIY this set, make certain yous permit yourself enough of time to let the epoxy and other materials used in the repair dry between steps. Additionally, consider covering the area across the surface you're working on with cellophane record to forbid the refinishing materials from running over the intact part of the tub or shower pan.
If you suspect that the crack or hole has created water damage in the subfloor, or if the project feels like information technology'due south more than you lot want to take on, hire a pro to do the work for you.

Source: https://www.homeadvisor.com/r/fiberglass-shower-repair/
Posted by: goyetteoundiciat.blogspot.com
0 Response to "How To Clean Tub And Shower Fixtures"
Post a Comment